It is a good idea to be prepared before you hit the Create A Free Profile button, because we need you to create a complete profile that includes:
Your name
Your social media handles
Your professional name
The name of your business, if you have it.
A one paragraph bio,
the location of the place where you make art,
your social media and/or website links,
A few photos of your work.
Choose 2-3 tags to help people find you by looking at the tags other artists have.
Create Your Free Richmond Artist Profile
Please note that we remove incomplete profiles one month from the day they were created.
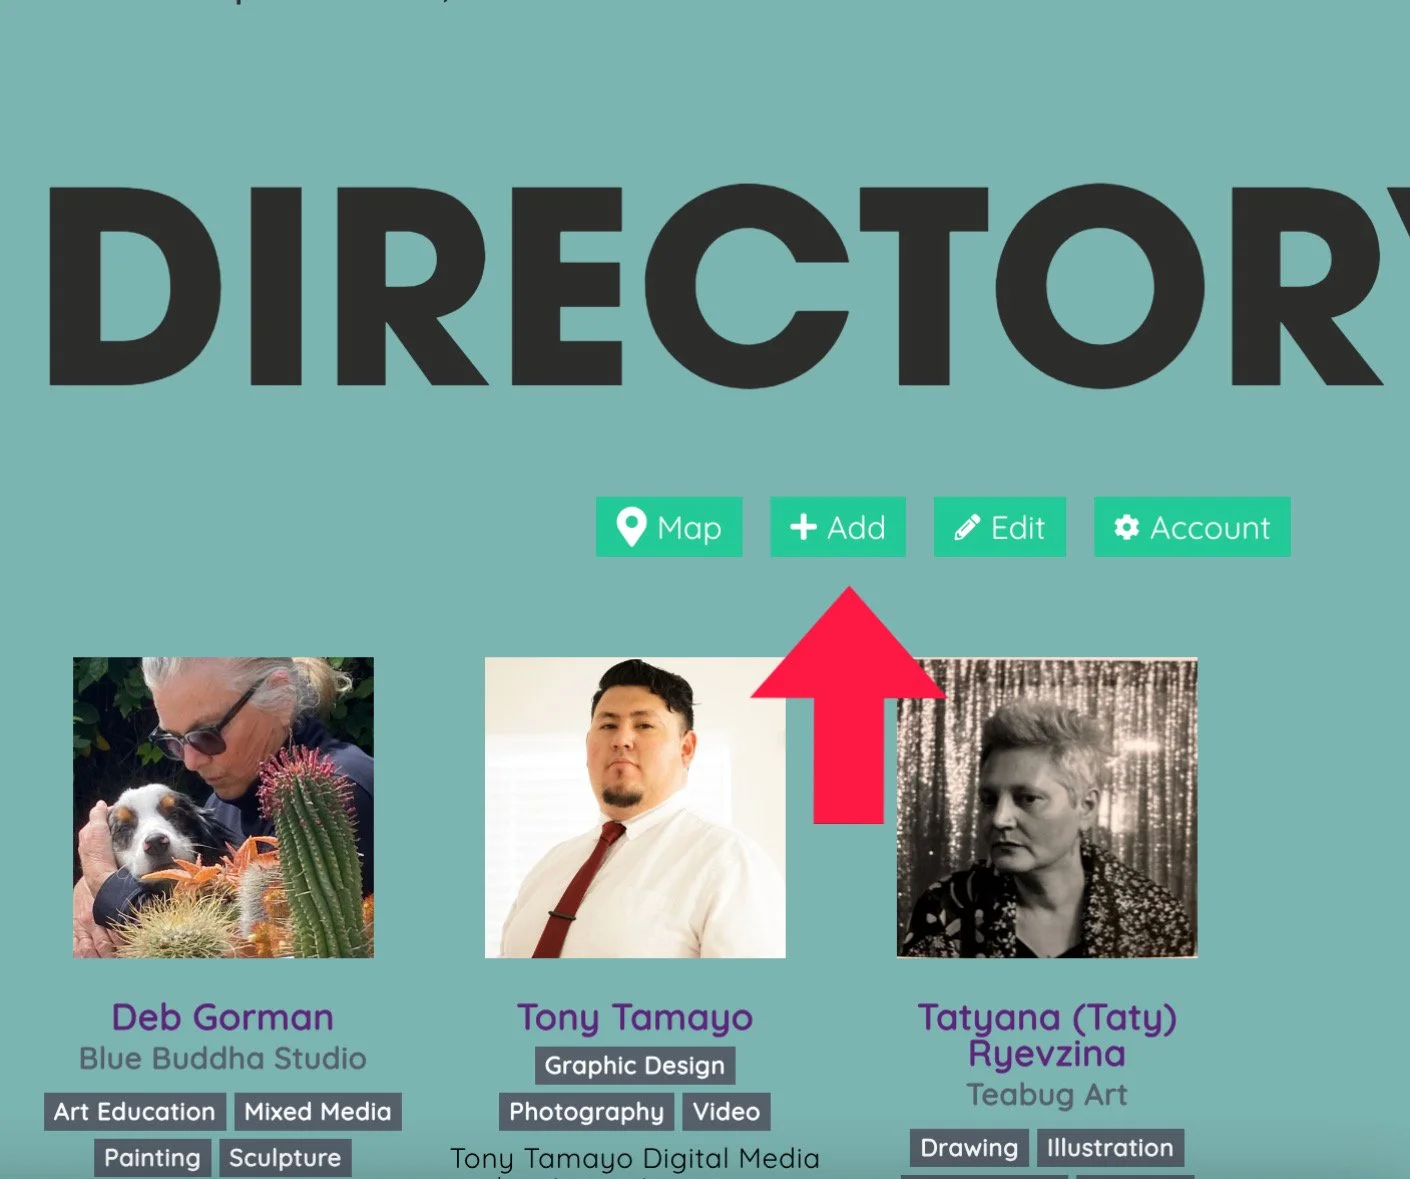
Step 1: Click On the + Sign
Sometimes it takes a minute for the Directory to upload. Click on the plus sign to create a new profile. Another window will appear.
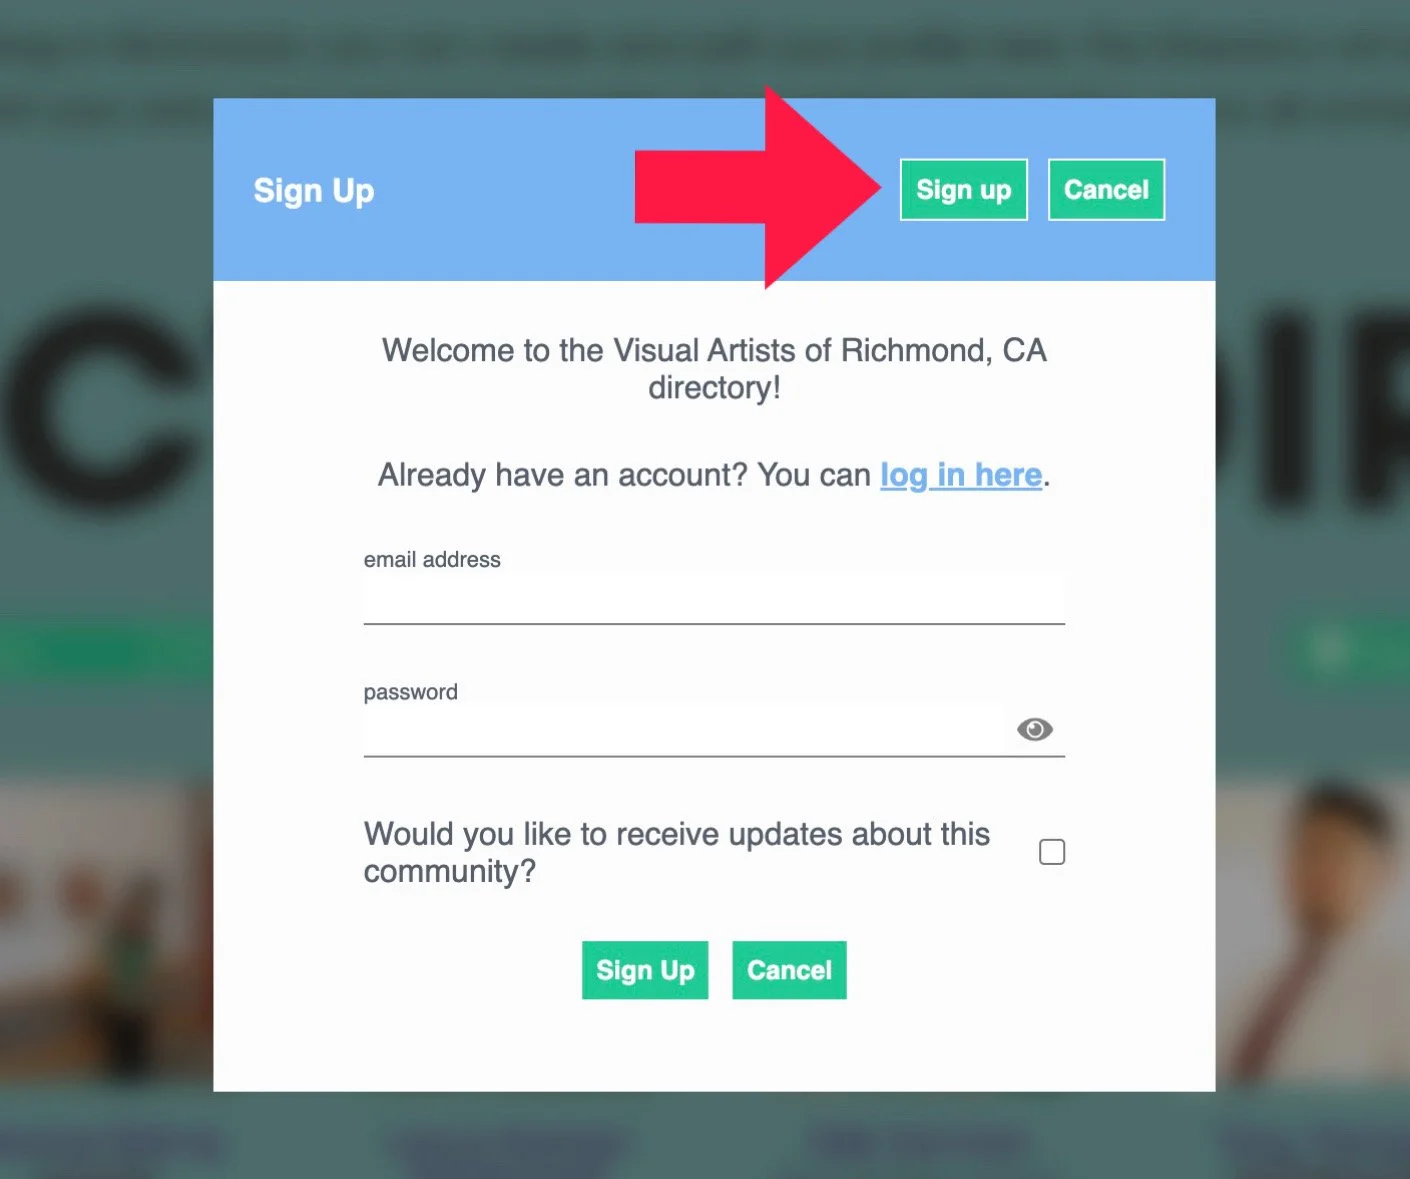
Step 2: Click On the Sign Up Button
Create an account. Enter a username and password for your account, then click on the “Sign Up” button at the bottom. Click on the box if you want to receive “updates,” i.e. our monthly newsletter.
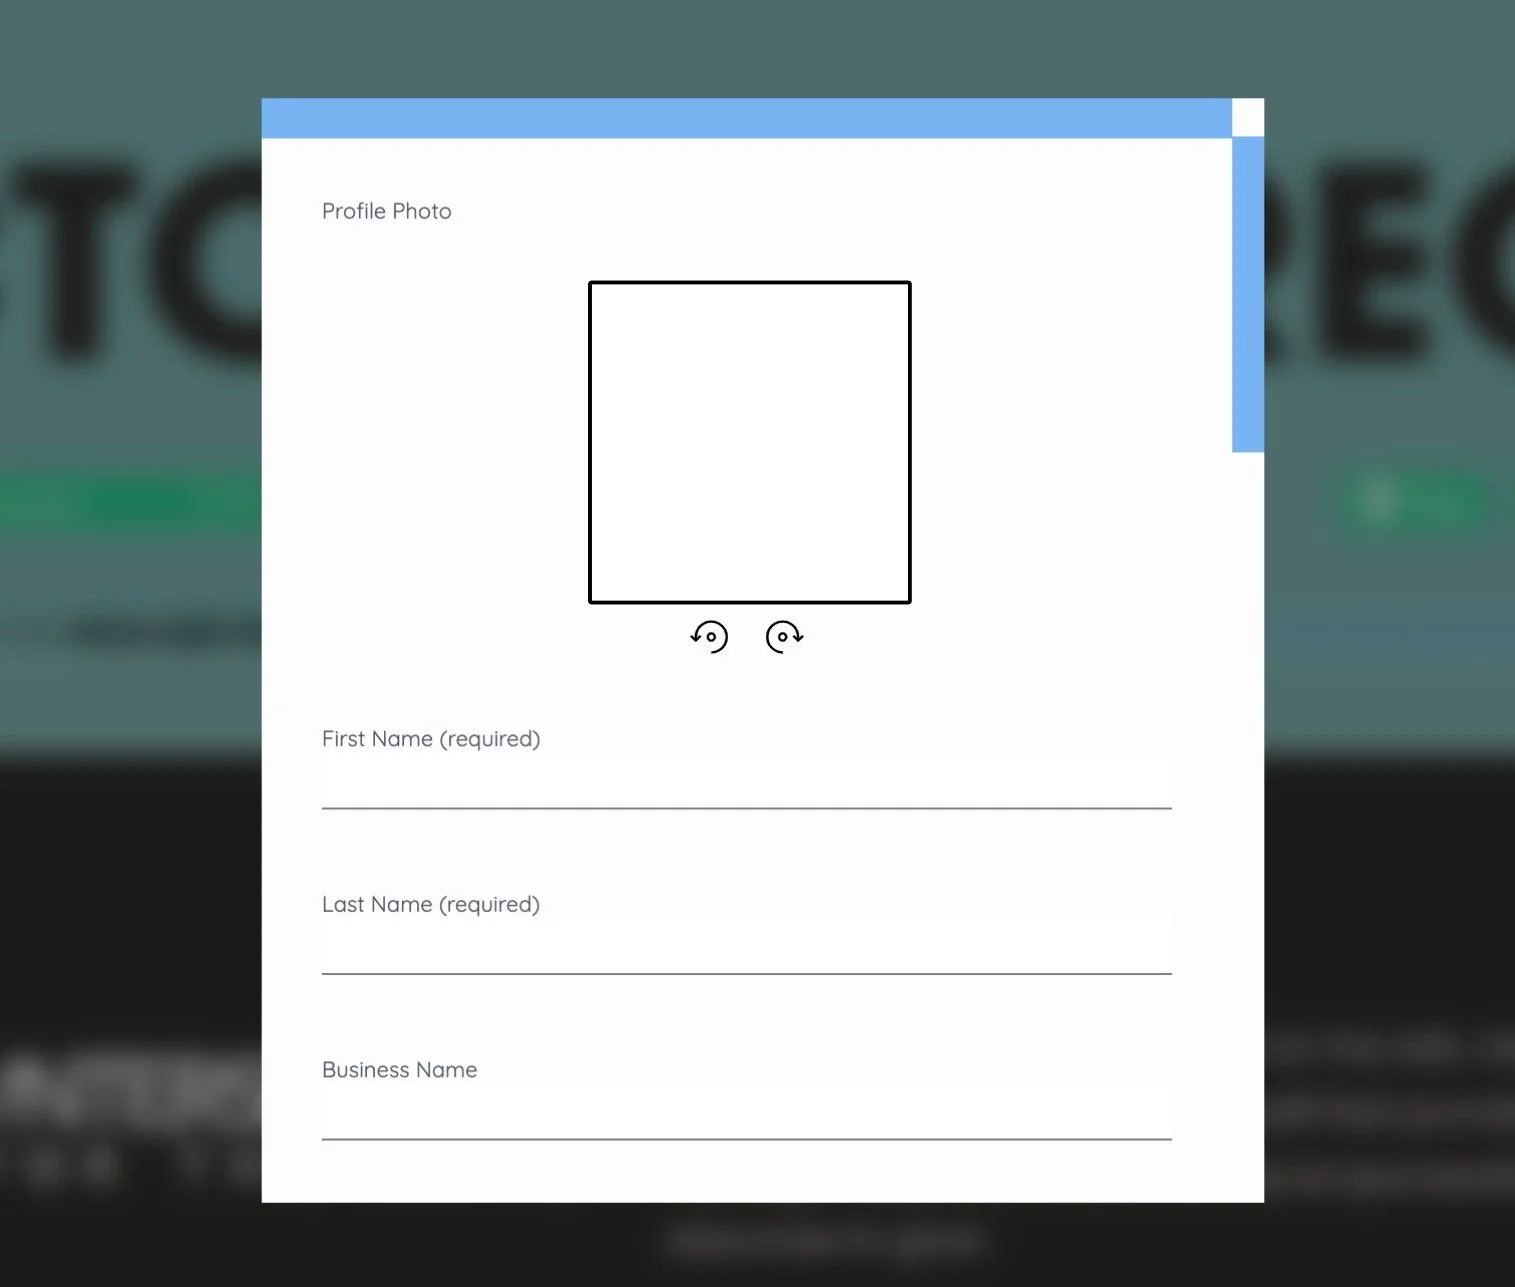
Step 3: Enter Your Profile Info
In addition to your name, you can enter your handle, professional name, or the name of your business, if you have it. Add a short bio, the location of the place where you work, your social media links, and a few photos of your work. Choose 2-3 tags to help people find you, and click on the “Apply Changes” button. Wait about 24 hrs for it to be published. All entries are reviewed to keep out bots.
How To Edit a Published Entry
Once your entry appears in the directory, you can edit it by clicking on the “Edit” button. Your name will show up enclosed in a rectangle, and a second “Edit” button will appear next to your name.
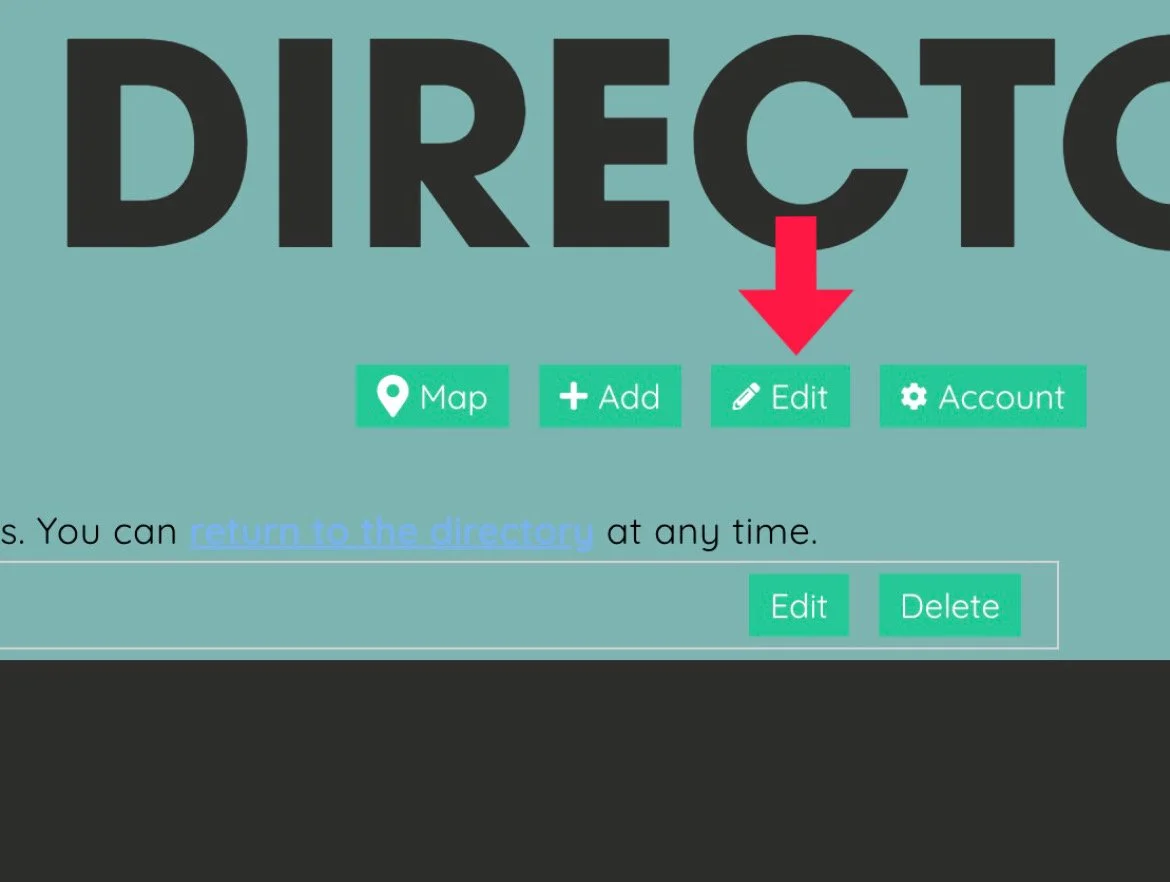
When you click on the second “Edit” button, the form you originally filled out will appear and you will be able to make changes. Don’t forget to click on the “Apply Changes” button at the bottom.
